


gOS or "good OS" is an Ubuntu-based Linux distribution created by 'Good OS LLC', a Los Angeles-based corporation.
Its CIO Dave Liu described that after meeting Enlightenment and open source people he realized that his dream to bring Web 2.0 applications into mainstream use could be realized by creating a Linux distribution that made it easy for users to access Google and other Web 2.0 applications
gOS 3.1 Gadgets
gOS 3.1 Gadgets was launched on January 3, 2009 as an upgraded bug fixed version of gOS 3.0 gadgets. This version fixes some bugs in gOS 3.0, but isn't a obligatory update for gOS 3.0 as most bugs in gOS 3.0 will be fixed using the built in updater automatically (but do not manually try to upgrade from Ubuntu 8.10 repositories as they are incompatible with gOS 3.0). gOS 3.1 is not an "upgrade package" but a new Linux distro, you can download from the good OS site the old version is no longer available.
Download Links
Hotfile
http://hotfile.com/dl/13520500/397426d/gos-3.1-costibardash.part1.rar.html
http://hotfile.com/dl/13520607/83e455b/gos-3.1-costibardash.part2.rar.html
http://hotfile.com/dl/13520672/77c1e61/gos-3.1-costibardash.part3.rar.html
http://hotfile.com/dl/13520756/47ed30b/gos-3.1-costibardash.part4.rar.html
http://hotfile.com/dl/13520832/0294fa5/gos-3.1-costibardash.part5.rar.html
http://hotfile.com/dl/13520929/1393a53/gos-3.1-costibardash.part6.rar.html
http://hotfile.com/dl/13521090/3a0d503/gos-3.1-costibardash.part7.rar.html
http://hotfile.com/dl/13521132/94e9d00/gos-3.1-costibardash.part8.rar.html
Uploading
http://uploading.com/files/44b7amc8/gos-3.1-costibardash.part1.rar/
http://uploading.com/files/51ed9a73/gos-3.1-costibardash.part2.rar/
http://uploading.com/files/466c5a61/gos-3.1-costibardash.part3.rar/
http://uploading.com/files/2623db3c/gos-3.1-costibardash.part4.rar/
http://uploading.com/files/3238edda/gos-3.1-costibardash.part5.rar/
http://uploading.com/files/1f78b822/gos-3.1-costibardash.part6.rar/
http://uploading.com/files/c2fa62a7/gos-3.1-costibardash.part7.rar/
http://uploading.com/files/37a56364/gos-3.1-costibardash.part8.rar/
The beauty of Linux is in users ability to do large amount of customization to have a unique user expereince. So today we will look in to some tips for a “better” Linux experience. The term “better” here is relative, because what works for me might seem a distraction for some or plain annoying to others; some of this “tips” might appeal to beginners, while advanced users might find it too easy. Hopefully some of these tips will be helpful to some of you.
1) Turn on your computer remotely by sending “magic network packets” to WakeOnLan supported network cards. This can be very helpful if you run a server at home but only access it occasionally. There is no need for you to have the server running all the time.
2) If you dual boot with windows, accessing Linux file system from your windows installation might be important for you. There are three windows applications that can help you do this: Explore2fs, Ext2 Installable File System, DiskInternals Linux Reader.
3) Similarly to have read/write access for Windows NTFS file system, you can use NTFS-3G. Most recent popular Linux distribution has NTFS-3G installed out of the box.
4) Share a single mouse and keyboard with multiple computers with different operating systems, each with its own display, with support for copy and paste. Thanks to Synergy, the most popular free KVM software switch out there.
5) Recovering data from damaged media can be handled by several Linux tools including some LiveCD, specifically built to help recover data. Parted Magic, Ubuntu Rescue Remix, SystemRescueCd, Foremost (data recovery), Ddrescue.
6) If you are a blogger like me and enjoy using desktop client over web editors, you will find these clients useful: Gnome Blog, Drivel Journal Editor, BloGTK, Thingamablog, Bleezer, QTM.
7) If you are a webdeveloper/designer, you will often find yourself testing a website across many platforms and browsers. IEs4Linux is a great painless way to check how IE browser will render your website. You could use services like browsershots, but I had mixed results with them.
8) Does your iPod miss iTunes? Here are three itunes alternative which will do most of what your iTunes would do, not an exact replacement; but does the job: Amarok, Banshee, Rhythmbox.
9) Follow multiple files by creating multiple windows in your console with the help of MultiTail, also known as tail on steroids.
10) Use Terminator to split your screen space with many terminal windows, both horizontally and vertically.
11) For even better control over your terminal display and customization and complex functions, GNU Screen is a much better choice over terminator; however terminator serves only one purpose.
12) Use RSIBreak to help prevent Repetitive Strain Injury. RSIBreak will force you to take short break, depending on your configuration, so that you don’t over-work yourself.
13) If you find yourself working on a dumb terminal (hello sysadmins) or prefer working on terminals, you will find newsbeuter to be an excellent RSS reader for the console.
14) I know some will disagree with me on this, but conky is an excellent compliment to your desktop experience. If properly configured, it can add a lot of value to your desktop environment. Check out this very creative conky setup and read about it here.
15) Do you do podcasts? rootprompt has a great article with huge resources for both Linux podcasters and listeners.
When asked to most of the users “How will you uninstall Linux when it is Dual Boot installed with Windows XP?” The common answers we got was “Start windows XP and format Linux Partition“. Well they were half correct, you do have to format the linux partition but what about the grub loader? The grub loader will still be showing you the option to boot Linux during the start up and by mistake if anybody goes for booting linux, the system will not find any linux on your machine and it will restart. so what can you do in this situation?
There is a simple procedure to uninstall or delete linux completely and safely by following a step by step procedure illustrated below and it is tested by me .
Requirements:
You need a windows 98 startup disk or windows XP installation CD.
How to do it:
1. Reboot your laptop with windows 98 start up disc or Windows XP CD and type the command “fixmbr”.
2. Above command will repair ur bootloader and rewrite ntldr which will replace grub loader of Linux and now you can see only Windows XP in the boot menu.
3. Now Boot up in Windows xp.
4. Go to Start > Control Panel > Administrative Tools > Computer Management
5. Go to Disk Management under “Storage”
6. Select your Hard Disk and then the linux partition.
7. Delete the linux partition this will delete linux and grub.
8. Thats it done now boot your laptop or desktop normally it will be booted by default in windows xp.
If you have any problem in the procedure given above leave a comment here…
It takes only an inch in your pocket to carry a Pen Drive :-) Along this post, we’ll see how Backtrack Distro loaded into a Pen Drive or a Live CD can wreck havoc on a Windows machine in just 10 minutes.
The Backtrack Live CD can be a golden resource in bypassing the preloaded Windows XP, it cuts in a way for the hacker to gain access to your native partitions without caring about the original OS.
To perform the below experiment you need
1. BackTrack ISO. Download here
2. Some ISO Burning Program .Download Magic ISO here
3. A little common sense :-)
Aim of the article is to shed the myth about Windows XP security. Just having a copy of password protected Operating system loaded on your system doesn’t guarantee privacy.
Minute 1
Your computer is open to physical access. For some unethical reason the finds the machine worth attacking.
* The Hacker inserts bootable USB BackTrack Linux Pen Drive / or Live CD in the machine. If the default first boot device is HDD, he goes to BIOS and changes it to USB / CD
Minute 5
After setting the First boot device as USB / CD . He slices in his Backtrack Live OS CD and boots into the Backtrack GUI.
The process followed above tells the machine to skip the operating system loaded onto the HardDisk (in this case we skip MS-WinXP and to boot up BackTrack)
Minute 7
BlackHat Action one
Dump the SAM file
A Windows XP machine usually stores passwords in SAM files stored locally in the X:/WINDOWS/System32/config/system directory. The encrypted file is protected from getting copied/viewed while the user is logged on in Windows XP.
However, by booting the system using a Live CD makes the files wide accessible to the attacker.
Which can be cracked ! by using proper tools :-)
# cd /mnt/hda1/WINDOWS/System32/config
# cp SAM /temp
# cp system /temp
# cd /temp
# bkhive system key
# samdump2 SAM key > /temp/passwords.txt
Black Hat Action Two
Kill that SAM
Owing to the cryptographic limitations, a black hat hacker might not be able to crack the Password (if the length is large). In those cases he might want to remove/disable it !
In most usual cases as far as I’ve tried http://home.eunet.no/pnordahl/ntpasswd/ works great. A cracker just has to burn that .ISO image onto a blank CD and boot the system from it.
By navigating through the text menus and doing as per the onscreen instructions, it
is trivial to reset a chosen user’s password or promote an existing user to Administrator privileges.
In the above image you may see the Password reset option which resets the WinXP password to blank.
Next screenshot shows that the password has been reset to blank.
After using the machine as an administrator, the malicious hacker makes sure to restore back the original SAM file so as clean up the evidence.
# cd /mnt/hda1/WINDOWS/System32/config
# cp SAM /mnt/sda1/
# cp system /mnt/sda1/
Cleaning up the tracks to evade detection
Cracking something might be easy, and so is getting caught.
Usually , a clever black hat takes the backup of original SAM file so that he might restore these files after the attack is finished. Installing a backdoor might be easy , but chances are that the authorized administrator of the compromised system might detect it. In that case its obivious, it will be quickly closed. Popular techniques to ensure successful backdoors include to use an alredy open port. Although, well configured Windows XP keeps logs of users when they access the system and run programs. There are built in programs in Backtrack that assist in log file modification.
WHITE HAT TIP: How to Prevent this happening to you…
* Keep the HardDrives encrypted. Who knows what the attacker might do from your sensitive and personal data
* by disallowing physical access to a system by an attacker. The cardinal rule that physical access equals total access exists for a reason.
* Keep a BIOS Password and Set the HDD as the first bootable device. This’ll prevent cracker from booting your system with a Live CD or USB disk.
* Keep strong passwords. This should mitigate the risk of having the password cracked by Dictionary attacks. Moreover it’ll make the BruteForce attack infeasible.
Hail Open Source
If you like the above post , great :-) Please share .
The Next-Generation Burning Application for the Linux OS
box-nerolinux-96 (18601 Byte) Nero Linux 3 is the definitive burning application for the Linux operating system. Based on the award-winning current Nero Burning ROM platform, Nero Linux 3 is the most powerful and versatile burning application available for Linux, and the only application to offer Blu-ray Disc and HD DVD data burning support.
Experience the most comprehensive burning application for the Linux OS
* Enjoy the same functionalities as in the newest version of Nero Burning ROM
* Burn data using any optical disc format, including CD, DVD, Blu-ray Disc, and HD DVD
* Ensure a quick and easy setup using SmartDetect automatic drive support
* Manage your music collection with integrated audio capabilities such as high speed digital audio extraction and FreeDB, which automatically searches for disc information over the Internet
System Requirements
General
* Linux kernel 2.4 or higher (2.6 recommended) with X-Window
* Glibc 2.3.2 and libstdc++ 6 3.4
* GTK+ 2.4.10 (or higher)
Processor and installed memory
* 800 MHz Intel� Pentium� III processor, AMD Sempron� 2200+ processors or equivalent, 128 MB RAM
Hard disc space
* 50 MB for program installation
Optical device
* CD, DVD, Blu-ray, or HD DVD recordable or rewritable drive for burning
Supported Distributions*
* Red Hat Enterprise Linux 4
* SuSE Linux 10.0
* Fedora 4
* Debian GNU/Linux 3.1
* Ubuntu 5.10
* Linspire 6.0.x
* Nero Linux 3 supports all higher versions of the above supported distributions
nerolinux-3.5.2.3-x86
1] Install NeroLinux 3.5.1.0
2] Copy the Keygen to Home Directory
3] open Terminal
4] chmod a+x keygen
5] ./keygen
6] Copy the Serial And Paste.....
Enjoy!!!!!!!!!
Code: [Check Download Links]
http://rapidshare.com/files/189646227/Nero_Linux_3.rar
Have you ever been attending presentations envying all the time the guy in front using his mobile phone to switch the slides? Or dreamed of sitting on the sofa and controlling your music player without having to go to the computer?
At least I did and so I searched on the net for possible solutions. Most of the projects are either outdated, only work for certain phones or certain software on the computer. Finally I discovered anyremote from Mike Fedotov, which you can download from the project's site at sourceforge:
http://sourceforge.net/projects/anyremote/
The great thing is that it works for different connections like bluetooth, infrared or serial cable (though I only tested bluetooth) and, according to the project notes, for all kinds of phones. Several configuration files for different software, e.g. amarok, xmms, etc. are included, and it is easy to write new ones.
NB:
* This was tested on Ubuntu 6.10 (32bit).
* There is also the KDE version kAnyRemote, which provides a little panel applet to change configuration files. I also tried this flavor, as I have KDE installed. But I'll focus on anyremote, the CLI version, as it has the same functionality, and you don't need to install any KDE libraries.
* I only describe using bluetooth and assume you have already set up a bluetooth connection between your computer and your phone.
* I assume you have a java enabled phone (JSR-82), I haven't investigated yet how this works if your phone doesn't support java.
* This post will be edited if questions or suggestions come up.
Steps to take:
1. Install dependencies
I can't tell you exactly what you need, because I encountered only one missing package, and that was libbluetooth-dev. I guess you need the bluetooth libraries for compilation even if you'll use another kind of connection. So I'll simply list all the blue* packages that are installed on my system. Corrections considering unnecessary packages or missing packages are welcome! You can either use synaptic or aptitude or apt-get on the command line to install the packages, so for instance you have to enter:
Code:
$ sudo aptitude install checkinstall gcc build-essential other_missing_packages
* gcc
* build-essential
* bluetooth
* bluez-cups
* bluez-hcidump
* bluez-passkey-gnome
* bluez-pin
* bluez-utils
* gnome-bluetooth
* libbluetooth2
* libbluetooth2-dev
2. Install anyremote
In case you have already compiled from source code before, this is nothing new to you. If not: Don't be afraid, there is no dark magic involved After downloading anyremote-*.tar.gz, go to the download directory, decompress the file, change to the now extracted directory and prepare for installation:
Code:
$ tar xvzf anyremote-*.tar.gz
$ cd anyremote-*
$ ./configure
$ make
Now, I advise you to have checkinstall installed, this will allow you to easily remove anyremote later on.
Code:
$ sudo aptitude install checkinstall
We install it:
Code:
$ sudo checkinstall
or, if checkinstall is not available
$ sudo make install
3. Install the Java client
The anyremote directory we extracted earlier contains the phone client file anyRemote.jar. Install this on your phone, either by sending it via bluetooth or by using a data cable.
Now, using an existent bluetooth connection, we can start anyremote and indicate which configuration file to use:
Code:
$ anyremote -f anyremote-2.6/cfg-examples/Server-style/adminExample.cfg &
Finally we start the java application on the phone, connect to the computer, and have fun!
The author is very cooperative and likes to hear from you if you used his program successfully with a phone not yet on his list on this page: http://anyremote.sourceforge.net/doc-html/intro.html. But let's try to keep questions concerning installation and such here in the forum.
a)Develop a boot loader to run on the PowerON
b) configured linux kernel
c)A sweet file-system all with the necessary software.
Hardware Used:
I) A P2 machine
II) 16MB RAM
III) 2GB HDD
Iv) A AMD Athlon 64 2800+(1.8GHz)machine as a host for our development
Maintaining the development Environment:
In this case,the development process has done on the host system,taking the targeting system as the consideration,because of the high memory,advantage of the lower compile time of the host machine.Here,the concept of the "Cross-compilation "is needed.Because the CROSS_COMPILER is a system that runs on one type of processor,but compiles instructions for the another.
Setting up the HOST::
Though the presence of the different several processes I have used here "REMOVABLE STORAGE SETUP", where there are no direct physical link between the host and the target.Actually, a storage device is written by the host and is transferred into the target,which is used to boot the target system.
Preparation for the Host Environment::
1) Install a latest Linux edition of REDHAT,or other similar.
2) Format the target HDD with a suitable file system.(I prefer ext2).
3) The host system should have "Cross-Compiler toolchain" to build up the software for the target system.I have used GNU's cross Platform developent toolchain.I also used
i) Binary Utilities (Assembler,linker and Various Object file Utilities).
ii) The GCC compiler for GNU C,C++
iii) The C Library(like glibc,newlib etc.)
Binding up our personal Toolchaon::
Here , an alternative C library like "uClibc" is choosen for my personal system development.The "uClibc" is a C library optimized for embedded systems.
To build up our custom toolchain I have performed some steps as --------
With the open source Automation tools like "buildroot" I have configured the toolchain and installed it in "uClibc" version, "binutils" version, GCC version and so on. After the succesful toolchain compilation,it has installed in a specific PATH environment variable to the "bin" directory of the installed path.
Having the cross development platform ready,we need three components to build up a complete Linux environment for an embedded system.
A) The Kernel
B) The Root file System
C) The Boot Loader
Setting up the KERNEL:
First download the Linux kernel from "www.kernel.org" (say as inux2.4.20.tar.bz2) and extract it and cd to the directory.Now ,feel the thrillings that U'r ready now to compile the chossen kernel with your new toolchain.So, edit the "makefile" to set up the "CROSSCOMPILE" prefix using
Code:
CROSSCOMPILE =i386-linux-uclibc
Then configure the kernel according to the embedded target device requirements using
Quote:
make menuconfig
or make xconfig.
Then issue the "make dep" and "make bzImage" commands. The kernel image is now built in the "arch/i386/boot" directory. If the modules r enabled,implement "make modules",and " make modules-install" . The compiled modules will be installed in " /lib/modules/linux-".
Creating the Root File System::
I have created the root file system on the previous "ext2" formatted HDD.FIrst, we mount the partition as SUPER USER,by
Quote:
#mount -t ext2 /dev/hdc1 /mnt/target
Now enter to the /mnt/target dir and create a standard Linux root directory structure
Quote:
#mkdir bin boot dev etc etc/init.d proc sbin usr
Create "modules" directory in "lib" if modules were enabled.
Quote:
#mkdir /lib/modules
Now set appropriate permissions for these directories.To set up various core linux utilities like sh,ls,cp,clear,mkdir.......Fortunately u can get a tool that combines all the utilities called " BUSYBOX".Busybox is highly configureable,and u can select only those utilities u want to for your platform.U can select also static or dynamic compilation.
Compile it with your new toolchain.
Quote:
$ make
$ make PREFIX= /mnt/target install
This will populate bin,sbin,usr,usr directories with all symlinks to "busybox" binary in /mnt/target/bin directory.
Then,the boot directory needs to be generated with your previous compiled kernel image. U need to create the necessary device nodes appropriately in the "dev" directory using "mknod" utility; for example, the terminal devices like "tty", console , virtual terminal devices for VGA display,serial terminal devices,the ps mouse,null device etc.
Next set up the various startup scripts .Create a "rcS" script in " etc/init.d/"
Quote:
#! /bin/sh
mount -a #Mount the default file system mentioned in /etc
/fstab
/bin/sh #Invoke Busybox shell
Create "fstab " file in /etc directory
Create "inittab" file in /etc directory
#This is run as first script
:: sysinit : /etc/init.d/rcS
::askfirst :-/bin/sh
::restart : /sbin/init
::ctrlaltdel:/sbin/reboot
::shutdown:/bin/unmount -a -r >/dev/null 2>&1
Thse script may be customizesd according to the target requirements.
Installing the Boot Loader::
To make first bootable Personal linux system u need to install the Boot Loader.Copy the Stage1 ,Stage2 dir.s of GRUB from the host machine into target's boot/GRUB directory.Install the GRUB on the target hard disk.
Quote:
#/sbin/GRUB
#GRUB> root(hd1,0)
#GRUB> setup(hd1)
Now ,u need to edit 'etc/GRUB.conf as shown below:
Quote:
#Assuming the Storage device will be installed as first
#harddisk.
title MYPERSONAL LINUX
root(hd0,0)
kernel /boot/bzImage ro root=/dev/hda1
Atlast,the GRUB should be compiled with our cross toolchain.
Ready to Enjoy::
Shut down the host system.Remove the target HDD and install it on the target system.Power on this machine.See the GRUB menu.Select your choice.If choice the MYPERSONAL LINUX,your linux system get booted,and a Busybox shell promt should appear..
Now Start to enjoy........with Your Personal Linux System.
AddThis Social Bookmark Button
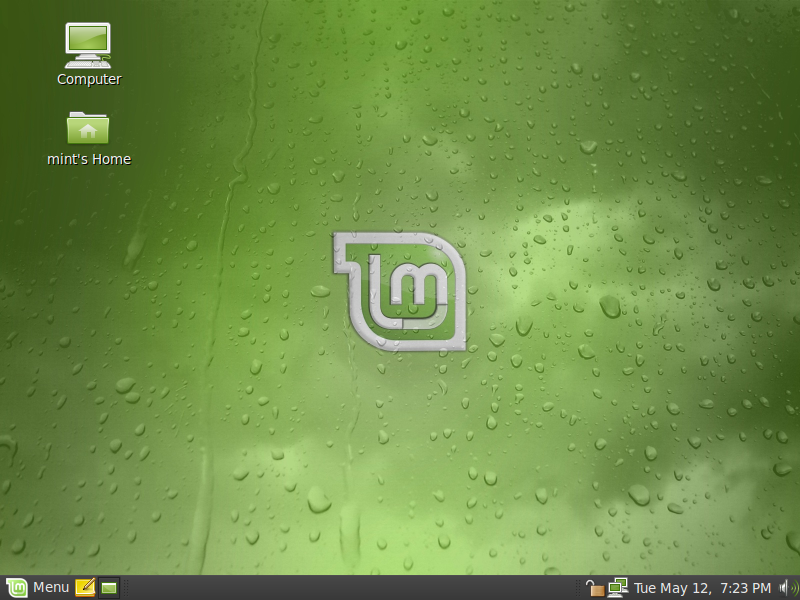
Based on Ubuntu 9.04 Jaunty Jackalope, Linux 2.6.28, Gnome 2.26 and Xorg 7.4, Linux Mint 7 "Gloria" features a lot of improvements and the latest software from the Open Source World.
mintMenu improvements
Highlights: New "Suggestions" feature, keyboard shortcut, trash statusmintMenu lets you filter the list of applications to quickly access what you're looking for. A new feature called "Suggestions" was introduced in Linux Mint 7: When filtering gives no results the menu now shows a set of suggestions related to what is being searched.
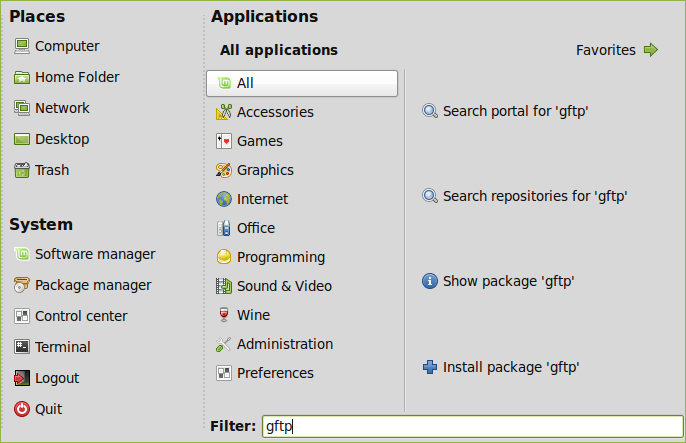
This makes it easier to install new applications or packages on the fly or to search the portal or the repositories, directly from the menu itself.
The menu can now be opened from the keyboard by pressing the left Control key and the left Super key (Windows key) simultaneously. This is configurable of course so you can assign it any key you want (note that you'll need to restart the menu for this take effect). The menu also closes itself when either the Super key or the escape key are pressed.
Favorites now come pre-filled and comments are shown under the applications. These features were already present in previous releases but weren't well known by most users.
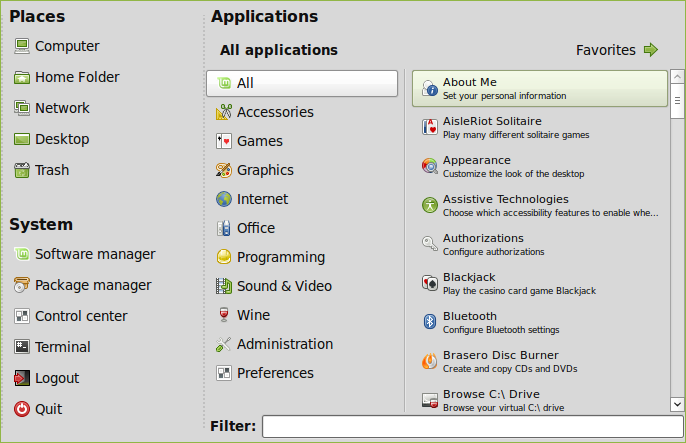
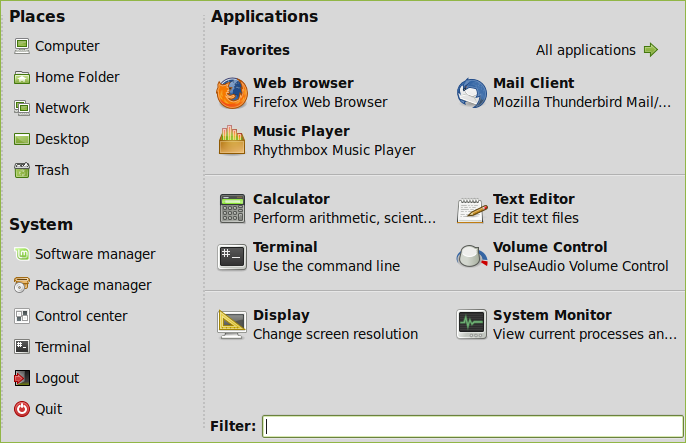
Hovering the menu now shows the Linux Mint release version and edition as a tooltip.
The trash icon now indicates whether the trash is empty or not and a right click option was added to empty it.
mintInstall improvements
Highlights: Featured applications, pre-filled information, seamless screenshots downloads, improved GUI layoutSome of the most popular applications were gathered in a new window named "Featured applications". This window shows the popular applications which are available and not currently installed on the system:
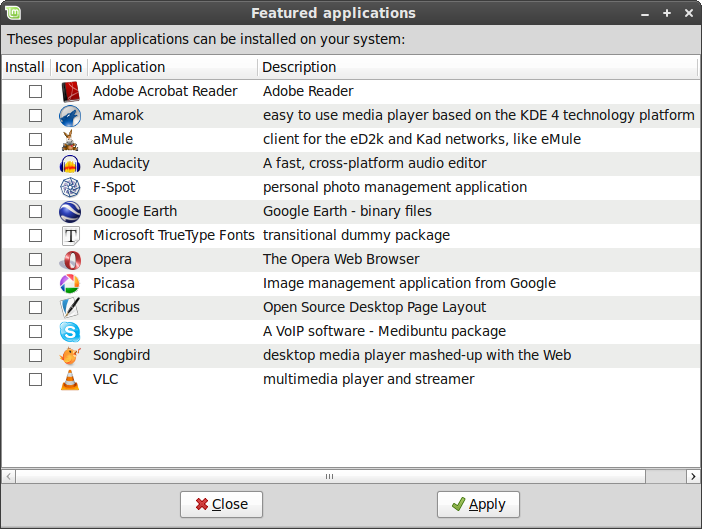
This makes it simpler for you to install most of what people are commonly looking for, all in one go.
The mintInstall frontend now comes pre-filled with all the data required to browse and install software, with the exception of the screenshots. Compared to the older versions of mintInstall this means you don't actually need to refresh the application to be able to use it.
When missing, screenshots are downloaded automatically. Of course, the "Refresh" button can still be used to download all of them at once.
The GUI layout was improved. The main window now shows less information and the once called "Versions" button was replaced with "More info".
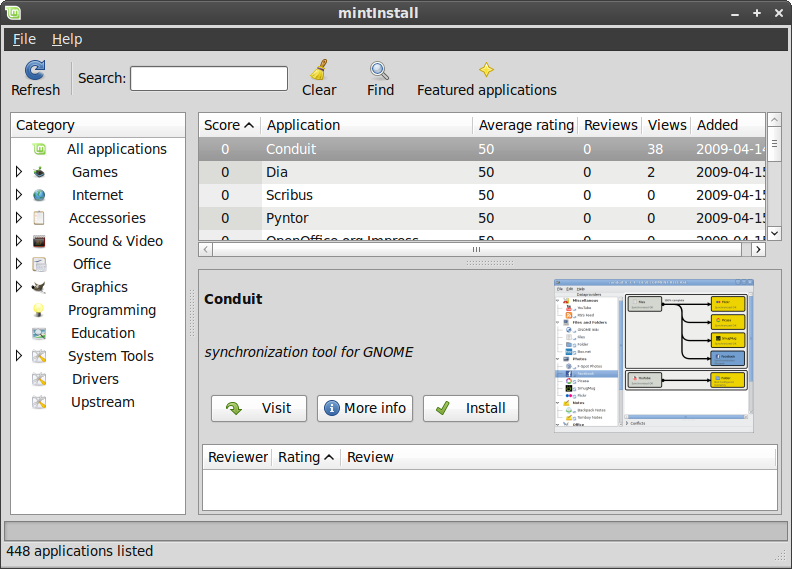
This opens a window where you can see the versions, licenses, package names and repositories, but now also the upstream website, a long description, and the size of the packages.
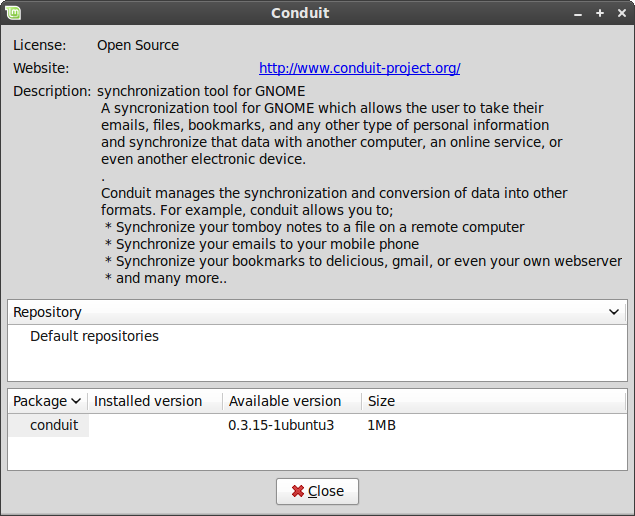
MintInstall now runs in root mode and doesn't store any information in your home folder anymore.
mintUpdate improvements
Highlights: Changelogs, package sizes, usability,The changelog tab now supports Linux Mint packages. Previous versions of mintUpdate could only show changelogs for packages maintained by Ubuntu.
mintUpdate now shows the download size associated with each package upgrade.
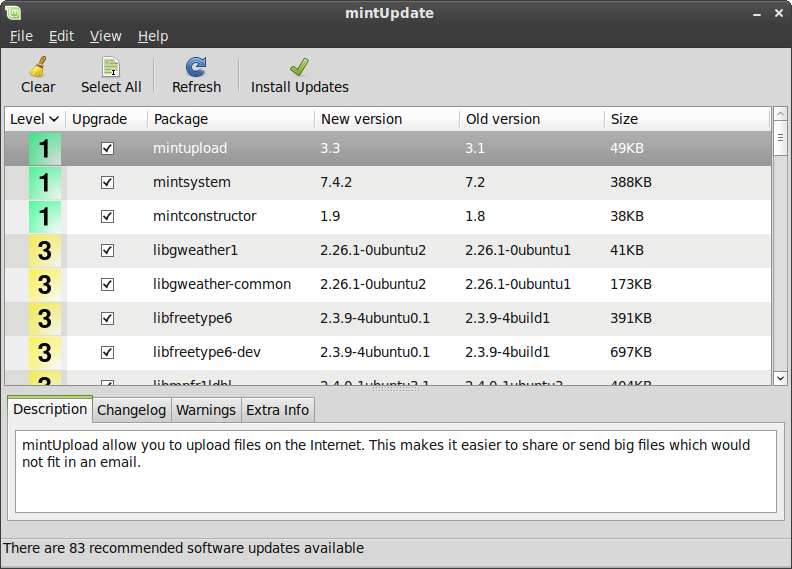
In accordance with the Gnome usability guidelines mintUpdate's system tray icon does not blink anymore. The presence of available updates is still quite noticeable as different icons are being used. The update manager now feels even less intrusive.
mintUpload improvements
Highlights: Ads-free, GUI improvements, graphical service manager, SCP/SFTP supportAll ads were removed from the the default service.
The GUI layout was improved in mintUpload to make the application simpler to use and to hide information which wasn't relevant to the selected upload service.
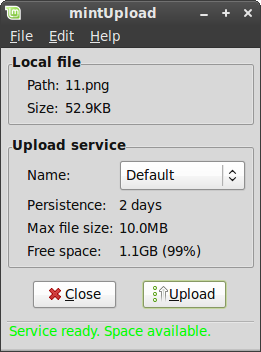
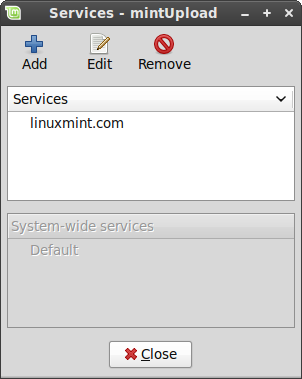
Services can now be created, edited or deleted graphically via a new service manager.
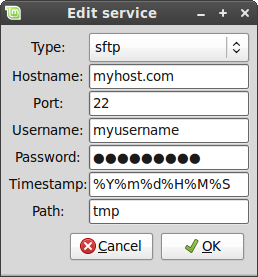
Two new protocols are supported by mintUpload: SCP and SFTP.
Credits go to Philip Morrell, Manuel Sandoval, and Dennis Schwertel for their work on the SCP/SFTP support and for their continuous help in improving mintUpload.
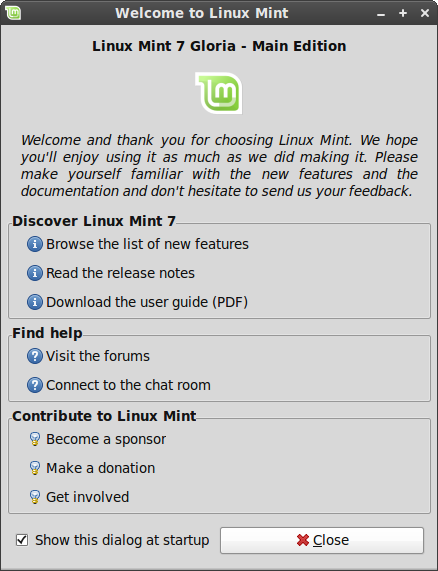
mintWelcome
Linux Mint now comes with the following welcome screen:
Command line goodies - apt version, rtfm
You can quickly get the version of an installed package by typing "apt version" followed by the package name. For instance, "apt version firefox" gives you the version number of the firefox package.
RTFM is not an insult anymore, it's now a command. It's a simple link to the "man" command of course and it's nothing special, but if someone ever RTFMs you after you've asked questions on the IRC, don't feel bad about it, just say thank you. This is our way to make fun of the unfortunately well-established RTFM syndrom and we hope, if anything, you find it amusing.
New artwork
The default icon set was replaced with Gnome Colors.
Various upstream improvements in the Murrina engine used by the traditional Linux Mint theme make widgets, and buttons in particular, look better than they did before.
A new theme was included and set as default, based on Shiki Colors and the Mint-Dew wallpaper from Zwopper.
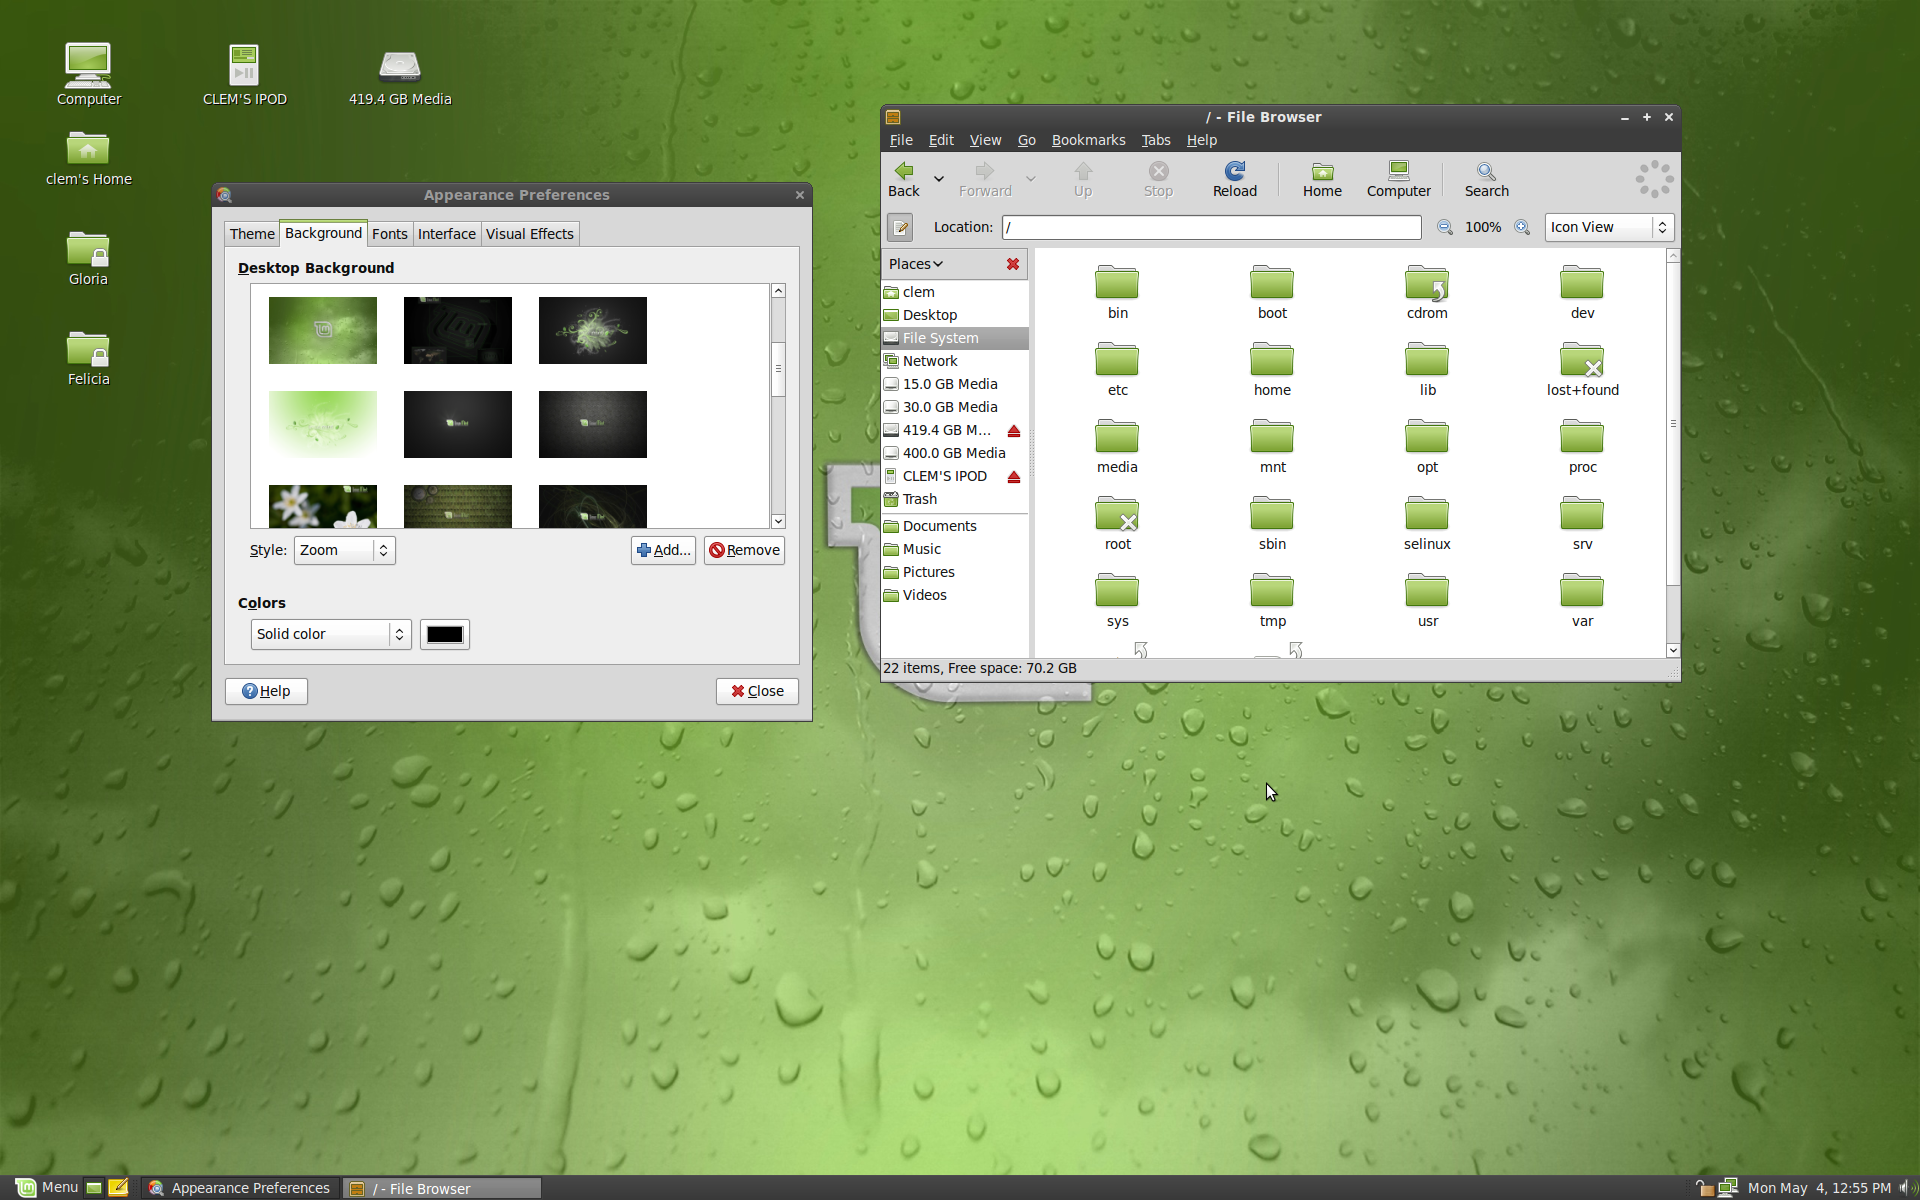
Other improvements
Firefox now comes with the Moonlight plugin and support for Silverlight 1.x.
The Firefox google search engine was enhanced to show links to popular search engines, as well as cached links and similar pages.
The Linux Mint 7 Gloria repositories are now signed.
Changes in the packages organization and the introduction of the mint-info virtual package make it easier to add additional desktops environments and editions on top of other ones. The new package hierarchy also makes it easier to upgrade Linux Mint.
mintSystem now comes with a new adjustment system, which restores important files at boot time. This strenghen the system against Ubuntu package upgrades overwriting Mint's specific configuration. This adjustment system can be configured in /etc/linuxmint/mintSystem.conf.
It is now possible to check the integrity of the liveCD and to boot the installer on its own.
MintAssistant was removed, and the installer now applies the same password to root as the one you choose for the main user.
mintDesktop was simplified:
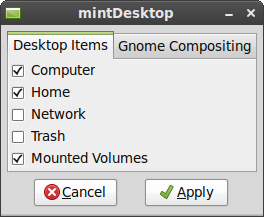
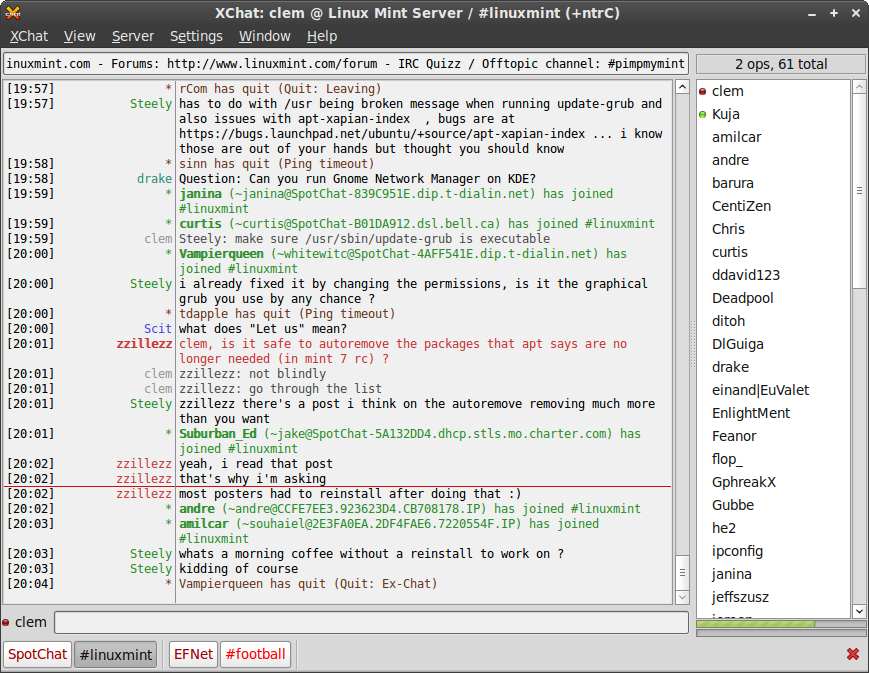
Xchat now replaces Xchat-Gnome as the default IRC client:
A new command-line too called Inxi, was introduced:
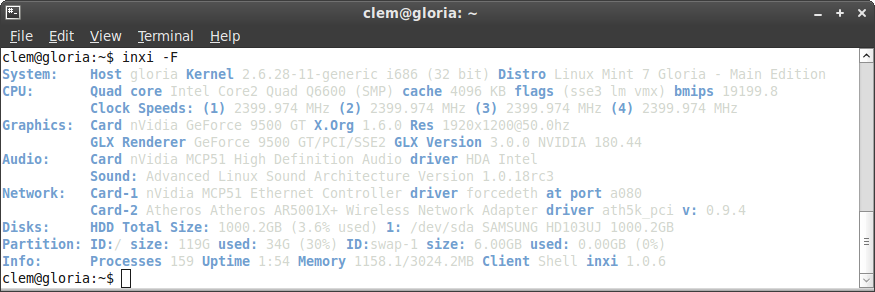
Inxi shows various information about your system. An Inxi report can help a lot when asking questions on the forums or in the IRC as it helps others understand more about your system.
Small improvements:
- "apt purge" was fixed.
- "apt source" now runs in user mode.
- All Mint tools are now launchable from the command line.
- All Mint tools now detect their environment and adapt to it. In particular they know whether to use gksu or kdesudo. The consequence of this is that packages like mintupdate-gnome or mintupdate-kde are not needed anymore, and the same package is now compatible with all desktop environments.
- All Mint tools using an about dialog now show their own version number.
Upstream Improvements
Linux Mint 7 Gloria comes with a linux 2.6.28 kernel.
Gnome 2.26 comes with noticeable improvements in PulseAudio support, screen management, file-sharing, and disc burning.
The Ubiquity installer features graphical improvements and support for the ext4 filesystem.
Ubuntu 9.04 also introduced better notifications, faster boot times, enhanced suspend-and-resume and better switching between Wi-Fi and 3G connections.
Information
Our latest release is Linux Mint 7, codename "Gloria". Please choose the edition you wish to download. If you're new to Linux Mint or if you're unsure as to which edition is right for you, choose the Main Edition.
Read the Linux Mint 7 User Guide (2.0MB) 
Choose an edition
Main Edition
Choose this edition if you're new to Linux Mint or not sure which edition to choose.
Universal Edition
This edition aims to provide the same features as the Main Edition without including proprietary software, patented technologies or support for restricted formats. If you're a magazine, a reseller or a distributor in Japan or in the USA then choose this edition.
It also comes as live DVD and features built-in support for English, French, Spanish, German, Italian, Swedish, Danish, Chinese, Korean, Portuguese/Br, Portuguese/Pt, Arabic, Hungarian, Lithuanian, Galician, Dutch, Russian, Polish, Norwegian, Japanese, Ukrainian, Romanian, Slovenian, Catalan, Greek, Czech, Slovak, Marathi, Norwegian [nynorsk], Croatian, Bulgarian, Turkish, Hindi, Finnish, Hebrew, Serbian, Belarussian and partial support for Basque and Bosnian.
x64 Edition
This edition wasn't delivered for Linux Mint 7 yet. This is Linux Mint 6 Felicia x64.
This edition supports the X86_64 architecture and it is optimized for 64bit processors. Note that the Main Edition (which is 32bit) is usually more stable and it also supports 64bit processors.

(Ubuntu feisty vs PCLinuxOS 2007)
Hello guys…
I am one of Linux enthusiast like you people, and have used almost all major Linux distros in past.Currently I triple boot Windows XP/Ubuntu Feisty /PCLinuxOS 2007.I am very impressed with PCLOS 2k7, even more than i was with Ubuntu. So i though why not write something which may help other people….
So here it goes as if why PCLOS 2k7 is better than Ubuntu :
All things written below are completely my own views, based on my experiences with Linux and Windows, during past years and are no way related to PCLinuxOS OS or Ubuntu developers, or any other person or company mentioned below.
- First reason, PCLOS is based on KDE,while Ubuntu is based on GNOME.
And the hard truth is that KDE is definitely better than GNOME. ( I know die hard GNOME users must be frowning). Well, I have points to prove :
(i). KDE gives so much power and options to user to configure their system and desktop, while GNOME in their goal of striving hard for simplicity (unnecessarily and sometimes more than required) cripples normal user (sometime even Linux geeks) in terms of above said parameters. KDE Control center gives far more options than GNOME.Even Mr. Linus Trovald supports thisfact in public and encourages users to use KDE ( google it to read Linus’s comments.)
(ii). KDE developers are far more active than GNOME people.
This is evident by the fact that KDE is going to release its 4th version (which is a major release, a complete overhaul,i mean everything has been reviewed), while GNOME has no plans of releasing even 3rd version.
iii). Lots of day to day used apps, like media player, torrent client, file manager, are far superior in KDE. To name a few, Amarok vs. Rhythymbox, Ktorrent vs (hey GNOME doesn’t even has a torrent client), Konqueror vs Nautilus, Gaim/Pidgin vs Kopete…. Almost everywhere KDE apps surpass over GNOME apps.
(iv). Now explanations to some of facts for which KDE is criticized by GNOME users mostly :
a. KDE is more like Windows.
Well first of all its not true. Because Windows itself copies all things from Mac, but you can’t do anything about that, because Mac people are almost always first to bring innovation in GUI. And if Mac people were first to develop the GUI [Graphic User Interface] (rather they also bought it from Xerox company in 80’s). So everything traces back to roots and looks similar. And GNOME doesn’t look like Windows because GNOME in first place doesn’t give many options in GUI. You know, GNOME’s philosophy is simplicity.
So better allegation would be that KDE is more like Mac. But believe me fellas, KDE people bring the best of all, along with their own innovations.
b. KDE is slower than GNOME.
Again same explanation, if you need power to configure, you need to have tools to do that. And it needs, both memory and processing. And i use both GNOME and KDE, i don’t see or feel much difference.
2. PCLOS has far more stability thanUbuntu. Reasons for that :
(i). PCLOS repository has softwares which have been tested by PCLOS developers completely, while Ubuntu has so many repositories available today, (though it is good in a
sense that Ubuntu has max. no of softwares available), that there are very high chances that some program or library dependency from unofficial repository may cause trouble to your system. (OK, this is not for geeks….. BUT this is hell lot of problem for newbies, and mid-experienced users….)
(ii). PCLOS is .rpm based which is better and more efficient packaging model for Linux binaries, than .deb, used by Ubuntu.
[Lot of people may not agree with this.So i want to clear that this is what i have learned from my personal experience, and research on Internet. So your thoughts are equally respected on this.]
3. PCLOS comes pre-installed with most of commonly used multimedia formats(except real player, quick time,and mpg), while Ubuntu doesn’t.
This point gives PCLOS a great push ahead of Ubuntu. Its too convenient in conditions like:
(i). Newbies who when using Linux for first time, just get shot when they see that their brand new Linux OS is not playing their favorite songs(mp3).
(ii). Now you will say, person above may simply double click the song, and Ubuntu will automatically install required binaries. True. But, just Imagine someone in developing nation, where Internet penetration is not good or not even available. How do you provide required binaries, as there are always dependencies involved in any Linux binary installation ? Will those people ever replace their perfectly running PIRATED Windows XP in such scenario ? Well, the answer is, NEVER…..
[I could never understand why doesn'tUbuntu pre-installs required multimedia formats. Legal Issues ? Well,i think , they are already getting into legal issues by providing it in repositories. so why not on CD ? May be some complex legal stuff..... if anyone kind enough to explain to me...]
5. PCLOS control center is a big and easy tool to configure system with just few clicks, while there is not anything analogous in Ubuntu.
This thing made me a fan of PCLOS. I thought while using Ubuntu that i will never be able to use 3d desktop on perman
6. Some things which i personally experienced with my own system:
(i). PCLOS automatically detected that i needed a software to correct my screen resolution, while Ubuntu didn’t.
(ii). PCLOS automatically configured my laptop touchpad correcly, while in Ubuntu, i had to edit x org file to get it working good. For newbies out there, its a nightmare to even find that file without any help from forums or people.
(iii). PCLOS detected my wireless card while Ubuntu didn’t.
(iv). On PCLOS, i could run 3d desktops (beryl and compiz) right after install while in Ubuntu i had to install these things from repositories.
(v). On PCLOS i can run even 2 or 3 videos with 3d desktop enabled, while in Ubuntu, whenever i even clicked a video file to play, it would simply exit without anything playing. ( I have a little old laptop with no separate graphic card)

This thing made me a fan of PCLOS. I thought while using Ubuntu that i will never be able to use 3d desktop on permanent basis but with PCLOS i am a complete 3d convert.
[For newbies : 3d desktop on Linux are freaking awesome. Windows vista with its too much hyped "Live Thumbnails in Taskbar" and "Aero Flip Through Windows" should be ashamed. I mean guys, it nothing in front of Linux 3d desktops. And Microsoft spends 5 BILLION DOLLARS on research (did u read that !).
i moved on to Ubuntu.
Why? Cause, i have started loving Linux, after working with Fedora. It feels great to have full control using the terminal. Now, my dad insists to have Vista too, so that my transition from Windows to Linux is smooth. I believe I have already shifted to Ubuntu, cause rarely do I login to Vista.
Now all this is on my laptop that I will be taking with me to my college. I have so many friends, who will consider that I am being rude if I don’t let the use the laptop for watching movies or playing games. (I am using my laptop for coding and web design, sometimes for songs, but no games! at least for now). So how do I do that? Well, most of my friends are bad at Linux, so I don’t need to worry about that, but still I have Vista and that shall be a problem.
I found a solution for this myself: Remove Vista Option from the boot loader! You might be thinking, then how do you access Vista!
That’s exactly what I am going to tell now.
To remove/edit the menu options, you need to edit this file.
/boot/grub/menu.lst
Before that make a backup file using the following command.
sudo cp /boot/grub/menu.lst /boot/grub/menu.lst.backup
Open your terminal. Type
sudo gedit /boot/grub/menu.lst
This should open the menu file. Scroll down and find something similar to this.
title Windows Vista Home Premium
root (hd0,0)
savedefault
makeactive
chainloader +1
It might vary depending on what you have installed and where you have installed. Comment them by adding a ‘#’ without quotes in front of each line. (Deleting them won’t be a good idea).
Save the file and try restarting. You won’t find the Vista option now!
Hey! now what do I do to boot Vista?
It’s simple. When the OS selection menu appears, press ‘c’ to enter the command line interface.
Type the following commands one by one.
root (hd0,0)
makeactive
chainloader +1
Note: Replace (hd0,0) with what was mentioned in the menu.lst file corresponding to Vista.
Finally type the command boot, and lo, Vista loads.
Now, that’s a geeky way. Provides access only to me and none else. One look and everyone thinks that only Ubuntu is installed, but peep a little more and hey! there is Vista too!.
Disclaimer: Helpful only if your friends are vista noobs and don’t know this alternative.
Hope that was helpful.
Are you thinking of trying out Linux? Fed up of everyday battles with Virus and Antivirus? Wanna give this open sourced free software a try? Well then this post is exclusively for you.An insight into what you shall find here.
- Which one to select?
- What more do I need?
- What should I know?
- What about my Windows?
So let’s get started.
Do you know there are some advantages that Windows has over Linux? First thing is you very well know what is the latest Windows version out there in the market. So you don’t have to think of which Windows will suit you best (of course some did have that problem, when Vista came with all of it’s different flavours). In Linux there are a lot of options, which makes it an advantage and also a disadvantage.
For those who experiment and are bored of their system they can always try out a new distro (that’s what the various flavours of linux are called). But for newbies it is a dilemma.
So I shall suggest the one distro that I have been suggesting my friends and who also are finding it comfortable with linux. Linux Mint is my suggestion to you. It is based on the user friendly and #1 distro, Ubuntu (as per distro watch website).
You can read about why I suggest Linux Mint at my blog. Most important reason is most codecs are preinstalled and hence gives you a wonderful linux experience. Also it has some looks similar to Windows so it shall be helpful for Windows users to use it.
Now let’s talk about the softwares required. For playing your music files we have RhythmBox and for your Movies and DVD’s we have MPlayer preinstalled with all codecs! Just works out of the box. You might have to install the graphics drivers and also the Wireless drivers. Most things work out of the box! That’s what I like about Mint!
Softwares I consider necessary
I installed Mint on my laptop and based on whatever I needed I made this list.
- Guake - This is a really quit replacement for the gnome-terminal. This one by default can be run by pressing F12 and makes it easier to invoke the terminal. Give it a try. Am sure you will love it!
- Emacs - I love this text editor more than vim. I use it to do most text editing and open it within the terminal using the command :
- g++ - Required if you are of the coding genre.
- XAMPP for Linux - This package bundles up Apache, PHP, MySQL and PHPMyAdmin and helps you set up your own server in minutes. It also installs a FTP server. A good alternative to manually installing Apache, PHP, MySQL and PhpMyAdmin and then configuring it. Read about the manual way here.
- Cheese - For using your webcam!
- NMap and Wireshark - Install these if you know you will use them the way they should be used.
- NFS - No not Need for Speed. I mean here Network File System which is useful for fast sharing of file between networks
- smbfs - Samba File System for mounting Windows based networks and sharing files between them.
- Computer Temp - This is a taskbar applet and shall show your system temperature. Useful for Laptop users.
- SmartMonTools - This helps you monitor your hard disk and ensure it’s long life.
- Amarok - Another music player. A replacement for RhythmBox. Both these softwares are worth using.
- VLC - You should be knowing all about it.
- Beagle - Indexed searching of your files.
- Eclipse - Integrated Development Environment
- NetBeans - Another Integrated Development Environment with support for Java based Softwares.
emacs -nw filename
This is a short list. There are many more software’s that shall capture your interests. Software’s like Compiz Fusion and Gnome Do are preinstalled. Read about how to set Compiz Fusion here.
The most cool thing about using linux is using the terminal. Gives you a geeky cool look and friends look with awe when i use the terminal with ease. You can learn how to use the terminal for everything you want to do from the valuable lessons at linuxcommand.org.
The best thing about Linux Mint for Windows users is that it exclusively is customized for new users to feel at home. Installation is a breeze and it detects existing Windows partition and helps you in dual booting your system with your existing version of Windows and the new Linux Mint!
There is also a detailed ebook which shall guide you through the installation process and for your experimentation with Linux hereon!
Download Linux Mint Now! The Choice is Yours!